Share with Delivr

I’m taking a break from writing a post about QR-Codes to share a little HTML and offer my first impressions of Delivr – a new tool that has been making the rounds on Twitter this past week. In a nut shell, Delivr combines the URL shortening/tracking services of a bitly.Pro account with a QR-Code generator such as qrcode.kaywa.com and then adds a couple of extra functions for good measure.

For those of you who have not heard of Delivr or have not tried it yet, here is a brief look at what it offers.

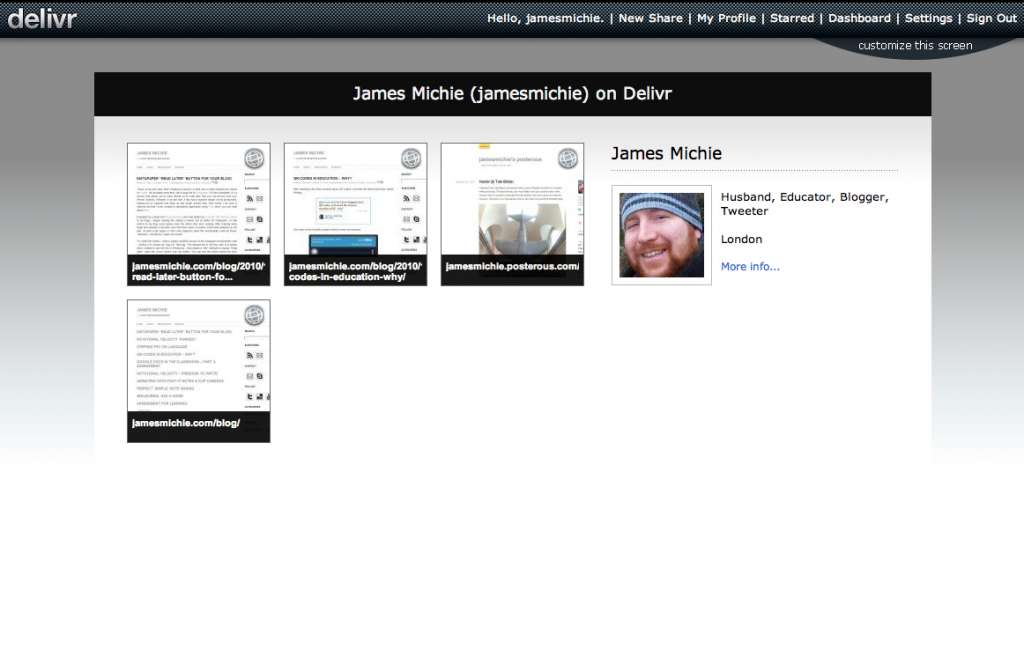
Signing up to Delivr gives you a variety of features including a profile page. However, unlike many other URL shorteners, rather than a simple text based list of the links you have shared, you get a series of thumbnails. I like this a lot as I am a big fan of the visual web. What’s more, it potentially offers a unique opportunity to share a series of links in a quick and visual way. For example you could create an account for a presentation and have all of your links on one page. This could then be shared with everybody in one go by displaying or tweeting a single URL. Others can easily share the links and when you load each one up their is a QR-Code that people can scan. I think this could be a very interesting way to present and with some events coming up early on next year I may give this a go.

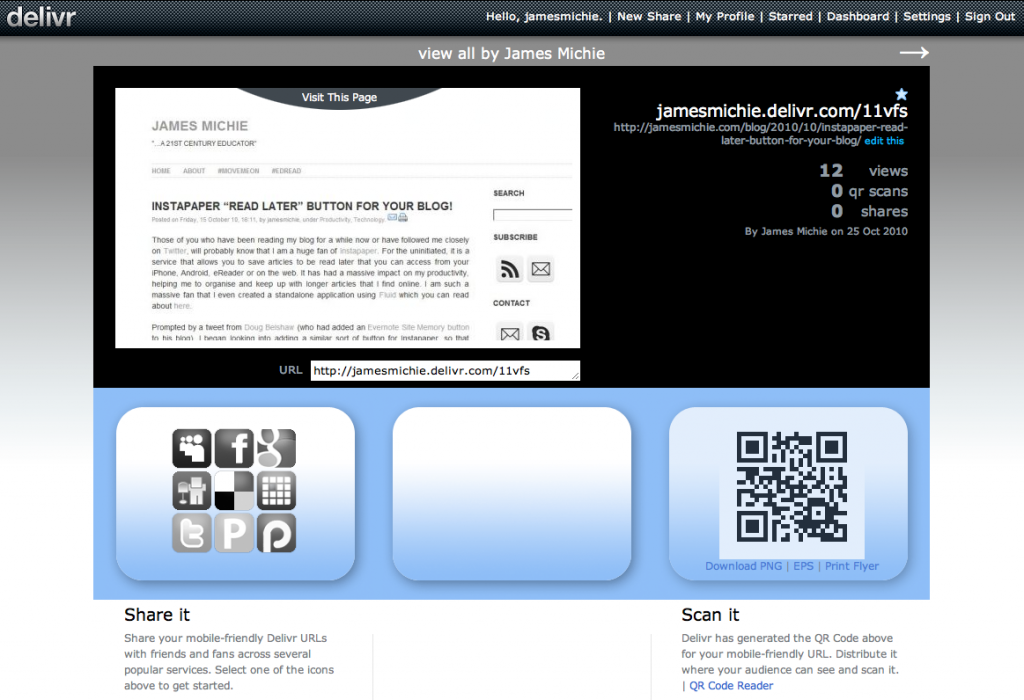
Each link that you share also gets a unique page as part of your Delivr account (indicated by an asterisk at the end of the URL). This page is mobile friendly and contains a variety of useful material. In the top left of the page you there is a good sized preview of the link you have shared. In the top right you can see the URL of the link. The link is made up of two parts – your profile name and a Delivr short URL. You can choose to share the whole thing or simply remove your profile name and just share the short URL. For example, both of these URLs work and will take you to the same page: http://jamesmichie.delivr.com/11vfs or http://delivr.com/11vfs.

In the bottom left of the page there is a pannel that allows you to share to multiple places including Twitter and Facebook at the click of a button, meaning you do not need to open a new tab. In the bottom right of the page their is the QR-Code that has been generated. Below it there are a few options as to what you can do with the QR-Code. It is here that Delivr goes a bit further than qrcode.kaywa.com in that the QR-Code features are more extensive. Firstly, you are not as limited in how much text you can embed inside the QR-Code and Delivr also does some funky things with Flickr images, YouTube videos and Google maps.

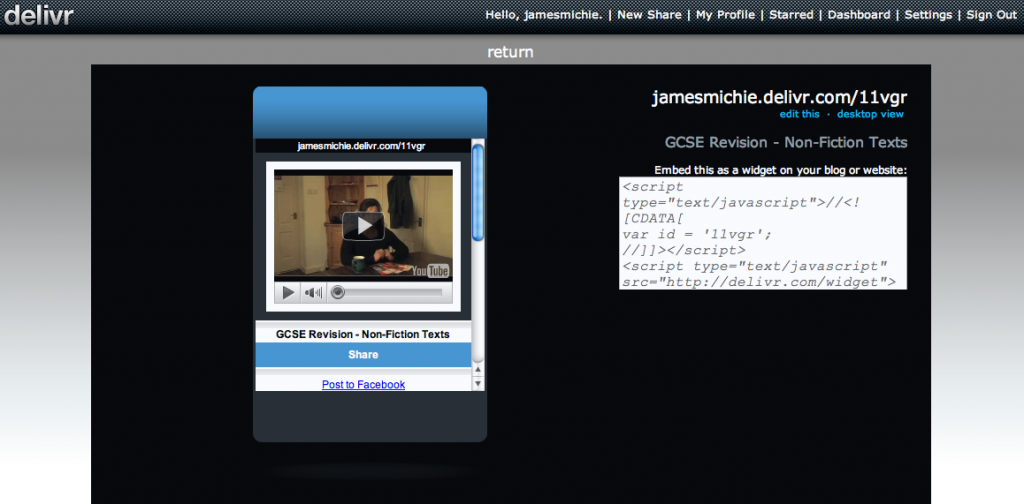
Here is an example of a YouTube video I have shared with Delivr. Not only can I share the short URL and get a JPG of the QR-Code but I can see a preview of how it will display on mobile devices:

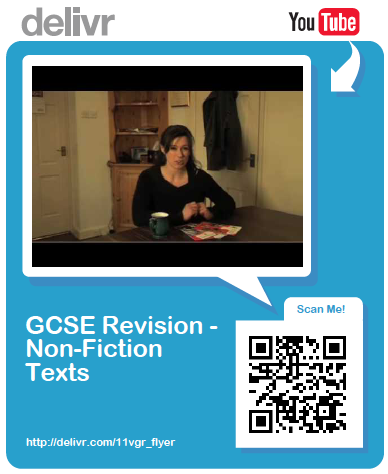
You can also embed the mobile view on a blog or website as a widget and you can print out this handy flyer with the QR-Code featured on it:

Included on the flyer is a still shot from the YouTube video and a description of what the video is. This is great for sharing info at school as the flyer exports as a PDF which can then be embedded on a blog/website, uploaded to a VLE or printed to be displayed in classrooms. I will be definitely making use of this feature in the coming months in both English and Media Studies.

Other features that you get from signing up to Delivr are very similar to those offered by bitly.Pro.

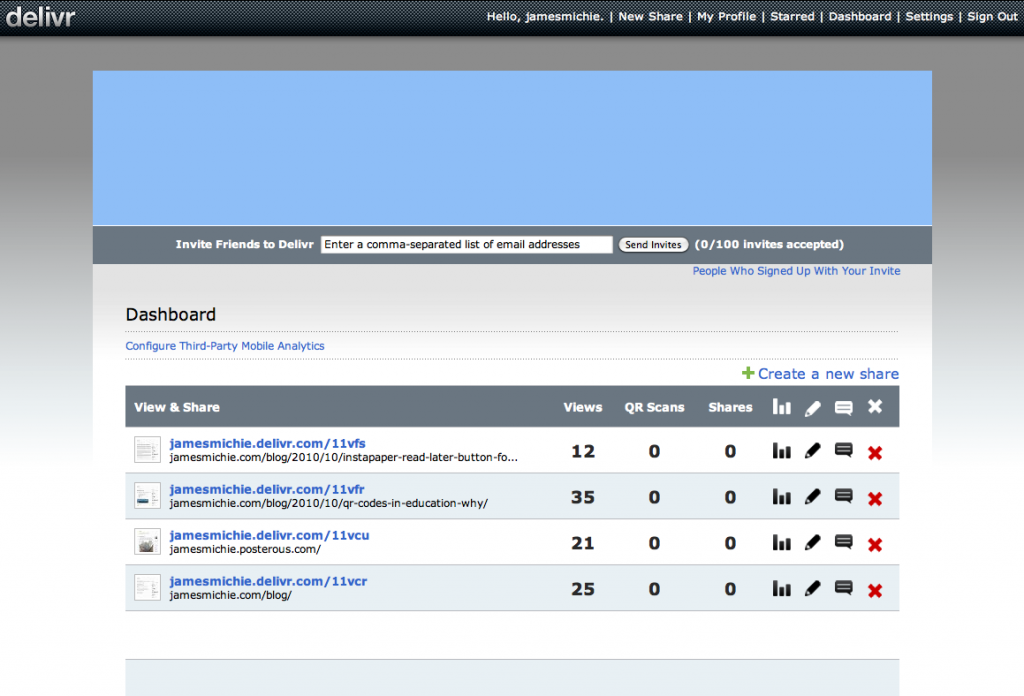
You have access to a dashboard which lists all of the links that you have shared. From here you can manage your shared links with the ability to delete, edit, read comments and access analytical data. Also, there is an RSS feed of your shared links and you can export all of your data stored on Delivr as an excel file.

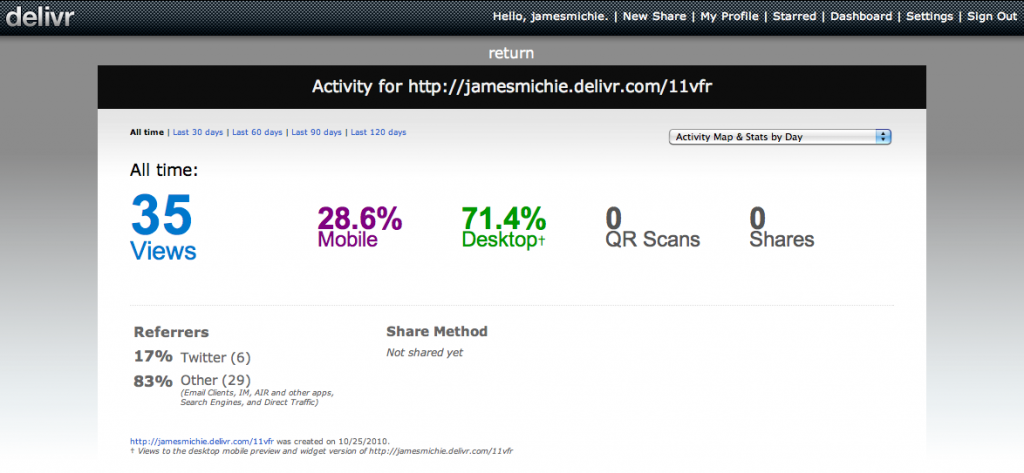
The analytivcal information is useful giving you a clear picture of how the links have been accessed, shared and if the QR-Code has been scanned. As I begin to explore the use of QR-Codes more readily this information will be very helpful.

Another potentially useful facet of Delivr is that people can follow your account in a very similar way to following someone’s Delicious account, where by you can see an updated list of links that have been shared. Further features include the ability to host your Delivr account under your own domain and to personalise your profile page with extra information and a background image – making the Delivr experience even more personal.

What’s more the web based interface has been extremely well thought through formatting itself perfectly on my HTC Wildfire. I could browse mine and others shared URL’s with ease, follow back friends who had begun following me and re-share links straight to Twitter, via Email or bookmark to Delicious. Once again, as with many apps, it is ease of use that will keep me coming back, particularly as I am using my phone more and more to access the World Wide Web.

Delivr works well via the web based interface but even better via its handy bookmarklet which you can drag to your bookmarks bar in your browser. This allows you to share links directly from the page that you are on while surfing the web.

Having been instantly impressed, I wondered if I could add a button to my blog so that people could use Delivr to share my posts without leaving the post page. I took a look at the code and saw that it was very similar to the code used in the Instapaper Bookmarklet. As I did with Instapaper, I adapted the bookmarklet code and then found an image to act as a button. In this case I used Delivr’s Twitter Logo as the image source reducing it to 32 x 32 pixels. You can see and use the button at the top right of this post. If you would like to add the button to your own blog then grab the following code:

<a href="javascript:%20var%20newscr%20=%20document.createElement('script');%20newscr.setAttribute('language','javascript');newscr.setAttribute('src','http://cdn.delivr.com/js/bookmarklet.js');document.body.appendChild(newscr);%20var%20newcss%20=%20document.createElement('link');%20newcss.setAttribute('type','text/css');newcss.setAttribute('rel','stylesheet');newcss.setAttribute('href','http://cdn.delivr.com/css/bookmarklet.css');document.body.appendChild(newcss);void(0);"><img src="http://jamesmichie.com/blog/wp-content/uploads/2010/10/Delivr.png" alt="Share with Delivr" title="Share with Delivr" /></a>
QR-Codes In Education – Why?

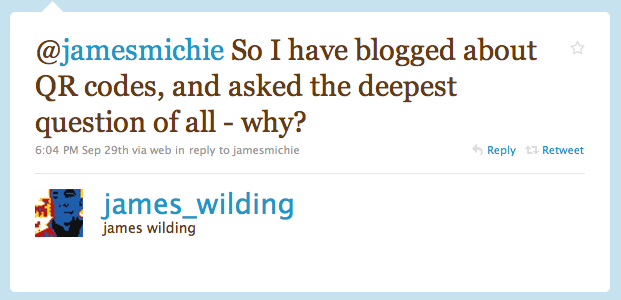
After tweeting a few times recently about QR-Codes I recieved the tweet below from James Wilding.

James Wilding Tweet

Click play on the AudioBoo player below to hear my response.

Links:

Subscribe to my Boos:

iTunesRSS

Google Docs In The Classroom – Part 3: Assessment

This is the third in a series of four posts about my experiences of using Google docs in the classroom. You can read part 1 here and part 2 here.

Part 3: Assessment (or 1-2-1 Teaching and Learning)

I will begin this part of the series by offering a little contextual detail which will help you (the reader) make better sense of this. Year 10 students (High School Freshmen to my American peers) in my school sit exams in March – intended to be their first real experience of externally set GCSE exams. Having begun this past year introducing the new OCR GCSE Media Studies syllabus, I decided that we would have the students sit their exam module in June of Year 10 rather than at the end of Year 11. Reasons? The exam is worth only 40% of their total mark, the exam units give the students a well rounded understanding of all the key media concepts, we will have more time to develop practical skills before completing controlled assessment of those skills in Year 11. Having committed to this set up the students studied the two units and sat a mock paper in March. The results were reasonably good but there was plenty of room for improvement across all of the grades. It was here that I had an “a-ha” moment. I could use the multiple editors / real time editing functionality of Google docs to good use. What if I had the students work through each of the exam questions in Google docs, I mark it, identify errors, set targets; they go back in and re-edit; I re-mark their work and so on; allowing them to develop their exam skills?

This concept is not new! The methodolgy is grounded well within assessment for learning practices and can be achieved in the classroom without the tech. What I was hoping was that the features of Google docs would improve the process, augmenting it, so that it would be sped up, increasing the productivity of both myself and my students. My belief that this could be the case was based on my previous use of Google docs to collaborate in planning – this had successfuly improved that proces ergo it could do the same for assessment for learning.

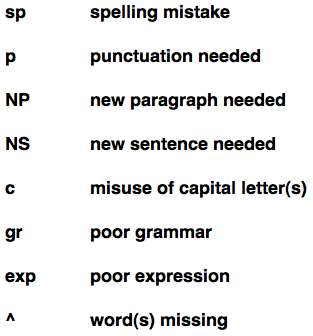
I set about planning an introduction to what we were going to do. I brought along a copy of the English department’s marking code as one of the issues for a number of my students was not their knowledge but the way that they expressed themselves was stopping many of them from achieving the higher marks.

marking code

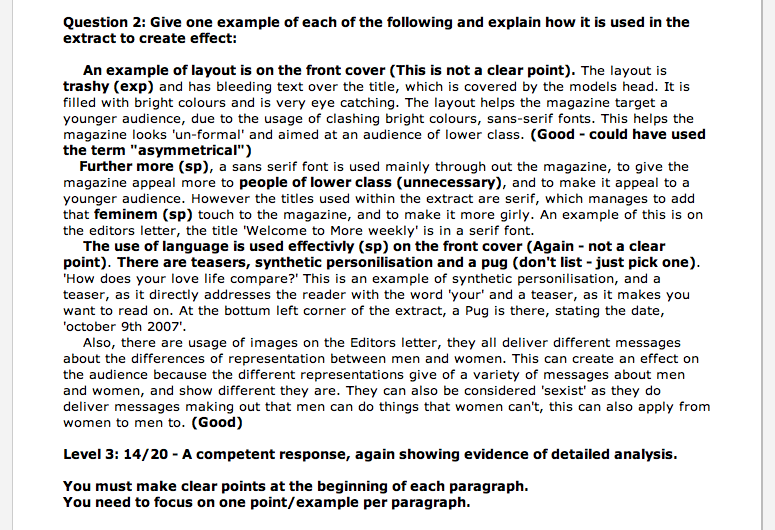
I copied up one of their responses and marked it in Google docs to demonstrate what a piece of marked work would look like. There were several possible approaches to this. For example there is a built in comment feature. However, I selected my own method – a mixture of my traditional marking techniques and the technology of an electronic document. I like to comment directly around or next to the error so this I retained by inserting my comments within parenthesis. I utilised the bold font feature to make it clear to the student where the offending punctuation, word or sentence was. I felt it was important to model this so they knew what to expect. At the bottom of each response I would follow another well practised feature of assessment for learning by including a positive comment followed by two specific targets to improve. What I did do however, was also give a specific mark each time, allowing the student to see numerically how they were doing. Were they improving, staying the same or getting worse? Here you can see an example of a marked first draft:

example of marking

Working in this way, with the students sharing their work directly with me, had a massive impact on my approach to both using Google docs in the classroom as well as the way I approached assessment for learning. When I started the students on improving their essay writing skills I decided to allow them sometime to work on these skills in class. I targeted specific students based on my knowledge of their weaknesses and potential and began to assess their work in real time with them. This 1-2-1 real time editing allowed me to target and support different groups of students across a series of lessons. I saw an immediate impact on their learning. Due to the immediacy of the intervention it really helped the less able students get up to speed and the more able were pushed beyond the standard they had been producing. Red pen was removed from the process and many said that they felt better having their work assessed as they wrote it because they “hated it when they had worked so hard on some work only to get it back littered with corrections”. In real time they could see where they were going wrong and correct it there and then. This meant that I could move them forward in their skills at a far more rapid pace.

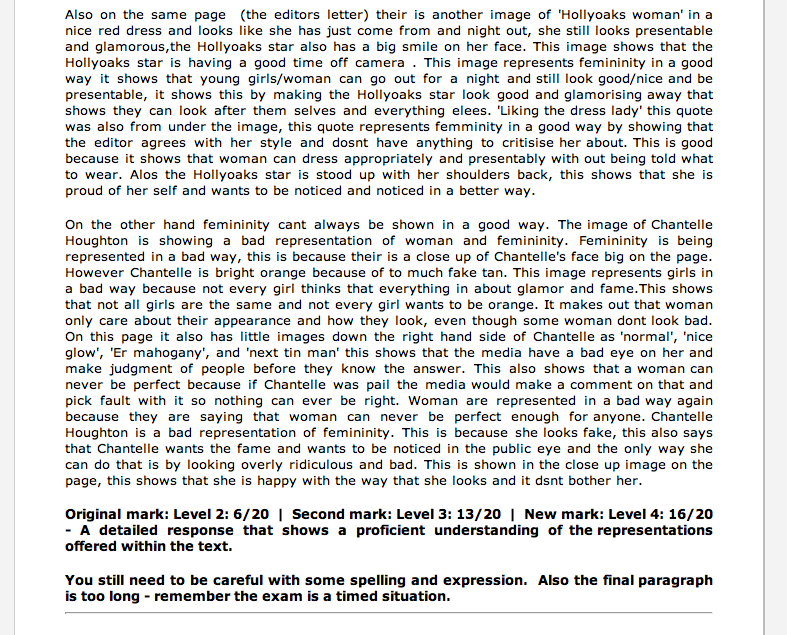
I continued this process over five weeks. Every homework (2 per week) involved responding to practice essay questions (draft / re-draft), while in class we worked on analytical skills and explored the finer points of representation, institutions and audiences. This new approach created a culture of expectation. I’ll be honset and say that it put quite a demand on me to keep up with my marking. With work being submitted / updated in a far more fluid manner  it created a situtation where for once I was forced to follow my own good advice: marking little and often rather than allowing the marking to amass. Here is an example of a students work that has been through several drafts, each time given a mark and targets for improvement.

example of improved response

The results of this approach brought assessment for learning into the heart of my classroom and had a significant impact on many of my students. I have found that students are usually mostly interested in assessment of their learning caring more about the mark or grade. As I chose to combine both the assessment of their learning with target setting throughout the process many of the students became more focussed on how to improve their work than on the actual mark itself. Some became so deidicated that they would re-submit their work less than twenty-four hours after I had marked it. And some would email me if I had not marked their work in a few days eager to see how they had done and how they could improve further. Here are some examples from one student showing her development through the five weeks:

Example 1: After 2 weeks: One response has been drafted twice. Here, you can see the original mark and improved mark including targets for further improvement. There are also two other questions that have been responded to and I have marked them offering guidance on how to improve.

Example 2: After 5 weeks: Here is the same student responding to a new set of questions the week before the exam was due to take place. Her responses are excellent demonstrating a high level of progress.

While demanding, using Google docs in this way completely put the focus on the students’ writing and exam skills. The most gratifying outcome of this was the progress that they made. They felt confident walking in to the exam because of the number of practice questions they had completed and that the feedback on how to improve had been so regular. I feel that the technology actually transformed an approach that is very much achievable in the classroom. The amount of writing that the students had to do was significantly decreased. Once a response was drafted they never had to re-write the whole thing – which they would have had to do if they had written their reponse to the questions by hand on paper. This, I believe, was a significant motivating factor for many of the students; ensuring that not only the hardest working students made progress but those students who would have found the amount of writing involved (re-drafting by hand) too much to handle also made progress.

A further benefit was that assessment came to inform the content of both my lessons and revision sessions in the run up to their exam. Marking little and often, having the students redraft and develop their skills allowed me to see patterns and areas of weakness within the class quickly; allowing me to adapt what I was planning and focussing on. The impact on me was therefore as beneficial as it was for the students. I certainly plan to use Google docs in this way again next year. It is very rewarding to be able to connect 1-2-1 with m students at this level, guiding them and supporting them in their journey to become more articulate writers. It is an approach that needs forethought and planning but is ultimately, I believe, the best approach to ensuring individual students make progress.

If you would like to use Google docs to support assessment for learning here are my recommendations on how to get started.

How to:

  1. Have students use a common name for their document. Don’t worry about the name being the same as Google docs identifies for you who the author is.
  2. Have them rename the document immediately after they have created it.
  3. Next, have them share the document with you. It is useful to have a folder set up in advance. Once each student has shared their work with you put it in the folder.
  4. Use a couple of classroom sessions to support selected students in real time – create an ethos of writing, editing an re-writing.
  5. Set deadlines for drafts to be submitted but encourage students to submit early – allows you to mark little and often.
  6. Decide upon a marking and assessment system – explain it to your students and model it on the board.
  7. Set clear targets at the end of the response and allow time for your students to resubmit.
  8. Have them edit the same document to limit confusion and aid their organisation.

Next time: What’s Next?

Animating With Post-It Notes & Flip Cameras

Today, I set about teaching the principles of animation to my Year 11 Creative Media Diploma class. After watching an inspirational (and slightly intimidating) example of Flip Book animation, I gave a short tutorial on how to make a simple animation using only a small pack of Post-It notes, a pencil (and/or fine liner) and a Flip camera. My students were suitably inspired by the video and were literally jumping out of their seats as I explained the principles of how animation works; also passing on a few key do’s and don’ts.

All they really wanted was for me to shut up and let them get on with it, and that they did. What followed was 40 minutes of pure concentration. You could hear a pin drop as everyone of them drew a frame, tested it, drew another frame, tested it again. They all realised pretty quickly that animating is a slow, time consuming but ultimately rewarding process. And everyone of them walked away understanding how animation works, having successfully created their own Flip Book.

I wanted to give them the chance to see each others Flip Books in action and to get them back in the habit of peer and self evaluation. To achieve this, they used the Flip cameras to record their Flip Book animations and then uploaded the video to the VLE. Watching each others work was great and all of the students began leaving positive comments and ideas for improvement under each of the videos. They have now gone away to reflect on the feedback they received and set themselves a target to take into their next piece of animation.

The Flip cameras proved to be invaluable, once again. Due to their ease of use and built in USB, they made filming and uploading the videos an absolute breeze, meaning that more time could be spent on the learning rather than dealing with technical issues that so often seem to arise with when technology enters the picture.

Here is one of the Flip Books made in today’s lesson:

#edjournal has a home!

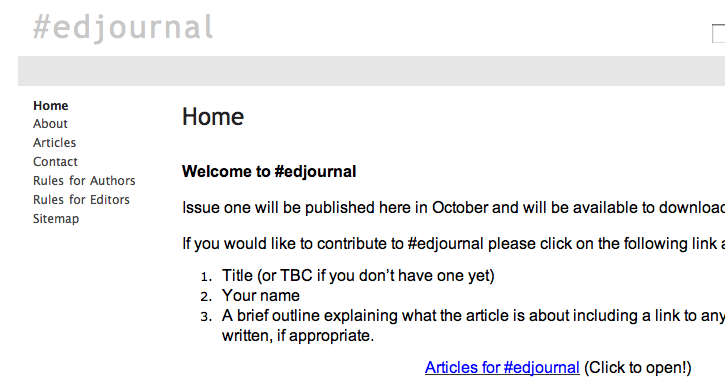
edjournal.co.uk

The #edjournal website went live this evening. It is still a little rough around the edges but is definitely taking shape.

The site includes a home page featuring the latest updates; an explanation of the journal and its purpose; links to articles currently under review; and rules for authors. A theme has been added and the contact info has been updated. Rules for editors will be added shortly along with further articles as we receive them.

If you wish to know more then head on over to edjournal.co.uk and take a closer look.