Animating With Post-It Notes & Flip Cameras

Today, I set about teaching the principles of animation to my Year 11 Creative Media Diploma class. After watching an inspirational (and slightly intimidating) example of Flip Book animation, I gave a short tutorial on how to make a simple animation using only a small pack of Post-It notes, a pencil (and/or fine liner) and a Flip camera. My students were suitably inspired by the video and were literally jumping out of their seats as I explained the principles of how animation works; also passing on a few key do’s and don’ts.

All they really wanted was for me to shut up and let them get on with it, and that they did. What followed was 40 minutes of pure concentration. You could hear a pin drop as everyone of them drew a frame, tested it, drew another frame, tested it again. They all realised pretty quickly that animating is a slow, time consuming but ultimately rewarding process. And everyone of them walked away understanding how animation works, having successfully created their own Flip Book.

I wanted to give them the chance to see each others Flip Books in action and to get them back in the habit of peer and self evaluation. To achieve this, they used the Flip cameras to record their Flip Book animations and then uploaded the video to the VLE. Watching each others work was great and all of the students began leaving positive comments and ideas for improvement under each of the videos. They have now gone away to reflect on the feedback they received and set themselves a target to take into their next piece of animation.

The Flip cameras proved to be invaluable, once again. Due to their ease of use and built in USB, they made filming and uploading the videos an absolute breeze, meaning that more time could be spent on the learning rather than dealing with technical issues that so often seem to arise with when technology enters the picture.

Here is one of the Flip Books made in today’s lesson:

Lino It – Online Stickies

lino it

A brief post to document a new online tool called ‘Lino It’ which I made use of earlier in the week to complete an “assessment for learning” based lesson with my Year 10 Creative Media Diploma students.

‘Lino It’ is a powerful tool for online collaboration, brainstorming and sharing of information through sticky notes which can include text, hyperlinks, images and video. To some of you this will be sounding very familiar, and you would be right in thinking that it sounds like I am describing Wallwisher; a similar and somewhat better known “sticky notes” tool. However, I feel that ‘Lino It’ is much richer, in part due to the way that it handles video and images, but more to do with what it offers behind the canvas. After signing up (for free) you are taken to your dashboard in which you can create, edit and organise your canvases. You can store favourite canvases, create groups between users and also schedule events (within stickies) that can be linked with your Google calendar.

Most importantly ‘Lino It’ is exceptionally user intuitive. My Creative Media Diploma students’ figured out more about the tool than I had in less than 15 minutes. Letting the students sign up was a great decision as it gave them ownership of their canvas and they were the able to arrange and control the “stickies” that were being added. My most recent discovery (while working on this post) is that you can embed your canvases in to your blog, website or Moodle course. They look fabulous and would make an excellent addition to a blog recording a student’s development of a project or as part of an online portfolio.

Some example canvases:

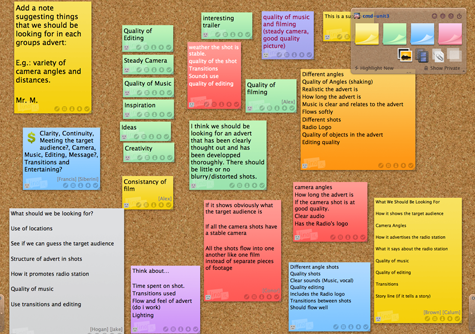
The canvas I used as a starter activity for the “assessment for learning lesson:

starter canvas

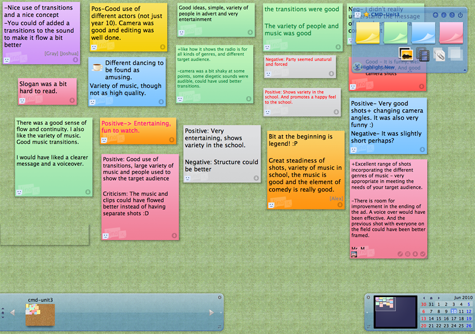
An example student canvas from the same lesson:

student canvas

You can try ‘Lino It’ for free or sign up to get started straight away.

Flip Cameras & Post-it Notes

flip ultra hd and post it notes

A fellow Media Studies teacher contacted me about a week ago to ask permission to use one of my student’s coursework pieces on his blog. I agreed and being curious had a scour of his blog to see how a fellow blogger was making use of his own class blog. While scrolling through the posts I came across an activity he had completed with his A2 students. To help them prepare for their upcoming exam, he got them to make videos using Post-it Notes explaining the skills they had developed in post production during their coursework. I immediately saw an opportunity to use the same tools to help my Y10 GCSE Media Studies students to prepare for their exam which is coming up on the 25th June.

First of all I had to assemble the tools. As this was a quick project, I decided, it would be a perfect opportunity to use the Flip HD Ultra Cameras that I had bought earlier in the year for activities such as this. I made sure that every group also got a tripod, fine liner, pack of highlighters and of course Post-it Notes.

When the class entered the room I had one of the A-Level student’s videos playing. After my students had settled I stopped the video and explained that we would be doing something similar today to help them with their exam preparation. Most of them had clocked the collection of camera and tripods as they had walked in so there was a sense of anticipation in the air.

I explained what the task was and what the expected learning outcomes should be. I then demonstrated how to use the equipment and made 10 seconds of video myself in a slightly Dylanesque way holding up and throwing away Post-it Notes one by one as I narrated direct into the camera. The students got a laugh out of seeing me on camera while also seeing how easy the equipment was to use. Next, I reminded them of a few key points and what their deadlines were. After that, I put them into groups and let them loose. I spent the rest of the lesson supporting them answering any questions they had and dealing with any technical difficulties. (Note – You will need more space than your classroom allows, I had planned ahead and new that one or two other rooms nearby would be free for the second half of the double lesson.)

Task: Explain what you need to know to be able to succeed in your GCSE Textual Analysis paper (Section A) on June 25th.

The lesson was a double and it broke down (neatly) as follows:

L1 – After the introduction and demonstration the students spent the majority of this lesson creating the Post-it Notes and scripts to be used in their videos. There are 3 questions in that part of the paper: Q1 focuses on Genre; Q2 focuses on Textual Analysis; and Q3 focuses on Representation.

L2 – During the second half of the double the students created their videos; uploaded them, making any necessary edits; and then exported a copy to be uploaded to VLE.

They had a great time and all of the students were proud of what they had achieved. More importantly the results were great with some students demonstrating an excellent understanding of what they need to do in their exam. Some of the videos are a little out of focus and one group learned an important lesson about shot distance but all in all I (like them) was very satisfied with the activity and its outcomes.

Here are two examples of the results:

And as ever, should you have any questions you can email me or tweet me!